Title: Easy Tutorial for Drawing a Nose
Summary: This article provides a simple step-by-step tutorial on how to draw a nose, enabling even beginners to master this essential facial feature.
Have you ever wanted to improve your drawing skills by mastering the art of drawing facial features? Look no further, as this easy tutorial will guide you through the process of drawing a nose step-by-step. By following these simple instructions, you will be able to create a realistic nose in no time.
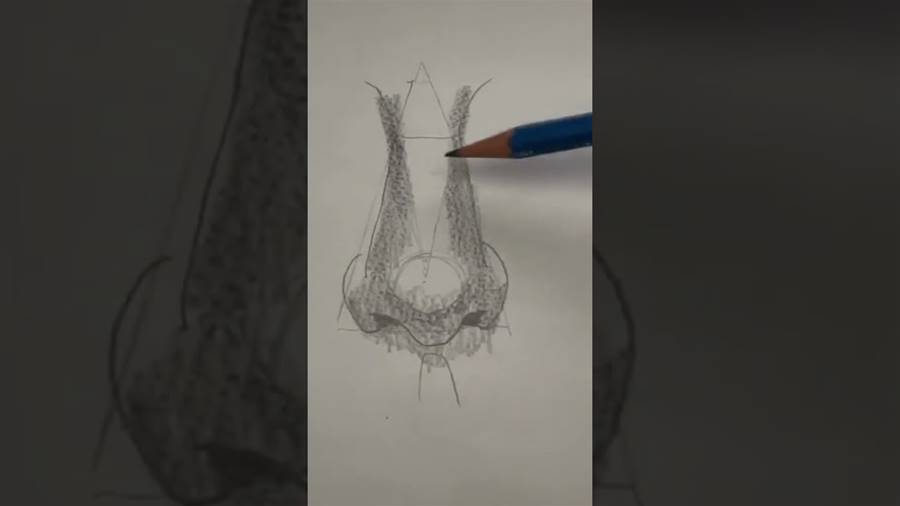
Step 1: Begin with a simple triangle shape
To start, lightly draw a triangle in the center of your paper. The top of the triangle should be slightly rounded, resembling the bridge of the nose, while the bottom should come to a point like the tip of the nose.
Step 2: Add the nostrils
Next, draw two small ovals at the base of the triangle to represent the nostrils. Place them slightly above the line where the two sides of the triangle meet. These ovals should be smaller and narrower on top, gradually widening towards the bottom.
Step 3: Outline the sides
Using the sides of the triangle as guidelines, draw two curved lines that slope down on either side of the triangle shape. These lines will form the sides of the nose. Remember to keep them symmetrical.
Step 4: Refine the shape
Now, focus on refining the shape of the nose. Use gentle, curved lines to connect the sides of the nose to the nostrils, creating a smooth transition.
The article is not finished. Click on the next page to continue.
The article is not finished. Click on the next page to continue.
Next page


