DIY No-Screw Tiered Tray Tutorial
2023/11/19
Report
Are you looking for your next DIY project? How about you make this DIY tiered tray from on YouTube? This is an ideal project for you if you enjoy making things out of real wood. It’s a quick, easy, and fun project to do with your friends and family. The whole project is also inexpensive to make and would only cost less than $10.
RELATED:
What are you waiting for? Gather your materials today and make this beautiful tiered tray for your home! Watch the video tutorial below to learn the step by step instructions.
ADVERTISEMENT
Thanks to for this adorable DIY project! Make sure to check the channel for more videos just like this.
Materials:
2 – 1 x 2-inch x 8 ft furring stripboard2 – 1 x 3-inch x 8 ft white pine furring stripboard1 – wooden table leg with screwhot glue gunpencil/markerrulerDirections:
Step 1
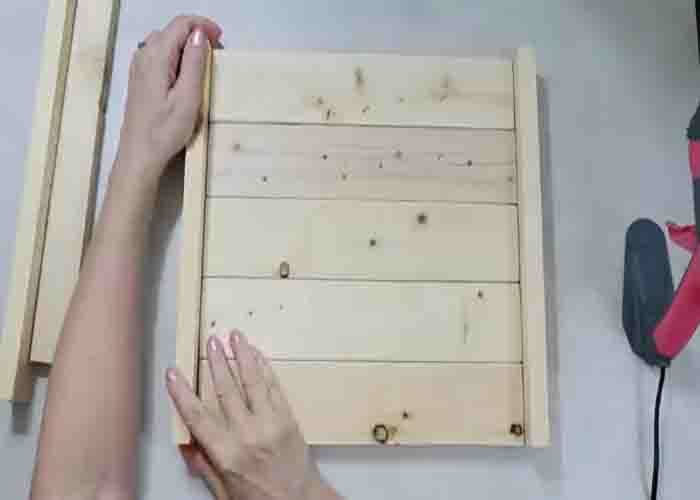
Cut five 12″ x 12″ of the bigger stripboards with four matching edges, then four 10″ x 10″ of the smaller stripboards with four matching edges.
ADVERTISEMENT
(Measure your matching edges as you go as you’ll need to make subtle changes to make it fit your piece.) After this, attach the five 12″ x 12″ together using hot glue, then its edges. (Before you put the final edges, mark the center first on where you’re going to put your center piece.)
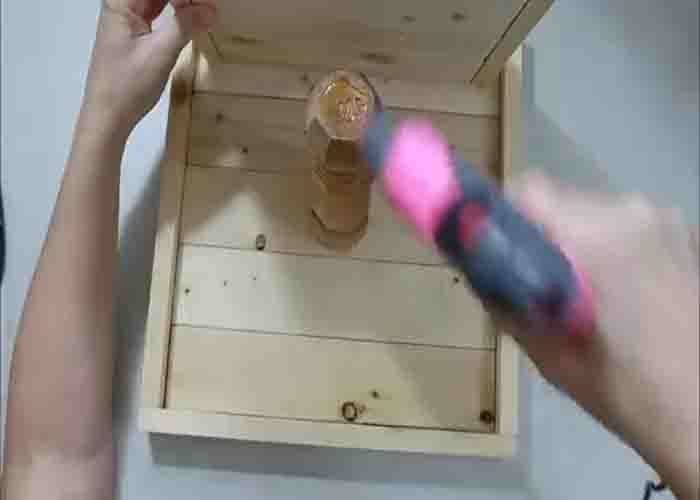
Step 2
Next, glue the 10″ x 10″ pieces together with hot glue as well, then attach their edges. After this, drill a hole in the center where the mark is, then place the leg. Once done, put the smaller tray above and secure it with hot glue. Your DIY tiered tray is now finished!
DIY No-Screw Tiered Tray Tutorial
ADVERTISEMENT
The article is not finished. Click on the next page to continue.
Next page
🕯️ Could She Have Been Saved? — The Real Story Behind Lady Sybil’s Death in Downton Abbey
2025/11/06

Why Dan Stevens Really Left Downton Abbey — The Hidden Anxiety Behind His Exit
2025/11/06

Caitriona Balfe Calls Out Cyberbullying: 'Enough Is Enough!' 💥
2025/11/06

Caitriona Balfe’s Family Secrets: Her Most Heartfelt Moments as a Mom 💖👶
2025/11/05

Bridgerton's Simone Ashley and Her Rumored Beau: What You Didn't Know About Their Relationship! 😍
2025/11/05

Bridgerton's Intimate Moments: How Actors Handle the Cringe-Worthy Realities of Filming Sex Scenes! 👀
2025/11/05

From Bridgerton to Real Life: Regé-Jean Page and His Girlfriend’s Romantic Moments You’ve Never Seen! 😍📸
2025/11/05

EXCLUSIVE: Sam Heughan Opens Up About His Sexual Harassment Experience in Hollywood 😢
2025/11/05

BREAKING: Sam Heughan’s New Announcement Has Fans Over the Moon! 🎉
2025/11/04

Bridgerton Season 4: Leaked Details Reveal Heart-Stopping Goodbyes and Epic New Beginnings🚨💔
2025/11/04

Regé-Jean Page’s Final Word on Bridgerton Return: ‘I’m Happy to Support the Cast!’ 💖💬
2025/11/04

Jonathan Bailey’s Hidden Romance: From a Former Love to a Mysterious ‘Lovely Man’ Who Stole His Heart ❤️
2025/11/04

From On-Screen Chemistry to Real-Life Love: The Downton Abbey Couples Who Took It Off Set 👀💕
2025/11/04

Bridgerton's Hottest Star Breaks Silence on His Heartbreaking Split—The Unexpected Reason Why💔
2025/11/03

The Untold Story of Kirsten Vangsness: Her Battle with Health Challenges and the Courage to Keep Going 💪
2025/10/28

The Shocking Truth Behind Thomas Gibson’s Exit from Criminal Minds – What Really Went Down? 🔥
2025/10/28

Yellowstone’s Shocking Departures: The Real Reason Stars Are Walking Away
2025/10/27

Brandon Sklenar and His Secret Girlfriend Go Public—Fans Can't Get Enough! ❤️✨
2025/10/27

Kevin Costner's Divorce From Christine: The Secrets You Never Knew About Their Split!
2025/10/26

Devastating Loss: Cole Hauser’s Father, Hollywood Legend, Passes Away, Leaving a Void in the Industry 💔🙏
2025/10/26