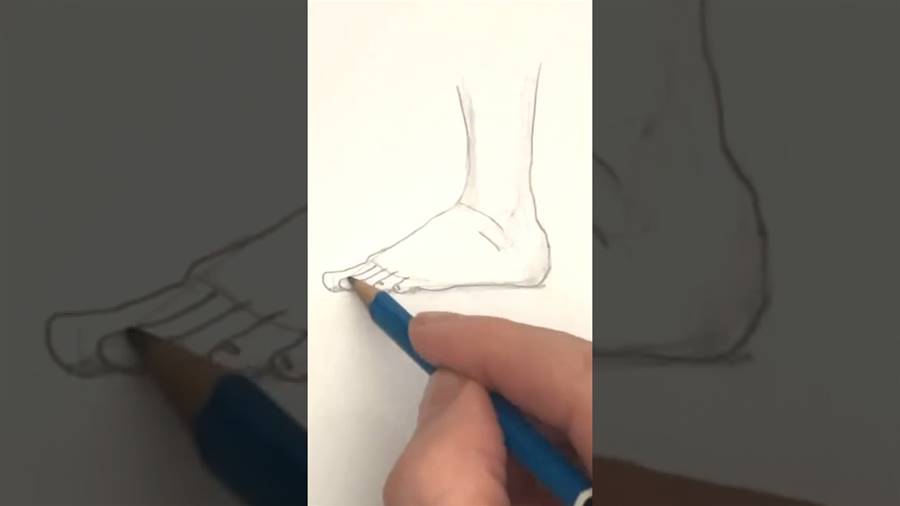
Title: Learn How to Draw a Foot with a Step-by-Step Drawing Lesson
Article:
Drawing is a popular form of art that allows individuals to express their creativity and imagination. While the human body can be a challenging subject to draw, learning to draw specific body parts can be a great starting point. If you're looking to improve your drawing skills and want to learn how to draw a foot, this step-by-step drawing lesson will guide you through the process.
Firstly, gather all the necessary materials, including a piece of paper, a pencil, and an eraser. A pencil is recommended for the initial sketching, as it allows for easy correction when necessary.
To begin drawing the foot, start by drawing a curved line that resembles the shape of a banana. This line will serve as a basic outline of the sole. Next, draw two straight lines that intersect the curved line at a perpendicular angle. These lines will represent the heel and the front part of the foot.
Moving on, lightly sketch the shape of the toes by drawing small ovals at the front part of the foot. It is important to keep the ovals proportional and aligned with the shape of the foot.
Once the basic shape is outlined, start adding more details to create a realistic-looking foot. Draw a rough outline of the ankle, paying attention to its curvature and proportion with the rest of the foot. Then, add small curved lines to define the arch of the foot. Remember to keep these lines light and subtle to create a natural look.
Next, focus on adding details to the toes. Start by sketching the toenails using small curved lines. Then, add shading to the toes to create depth and dimension. Shade the areas where shadows would naturally appear, such as under the toenails and in between the toes.
To complete the foot drawing, erase any unnecessary guidelines and refine the lines to achieve a clean and polished look. Take this time to add any additional details or shading to enhance the drawing further.
Drawing a foot may seem challenging at first, but with practice and patience, you can improve your skills and achieve great results. Remember, drawing is a process that involves constant learning and refinement, so don't be afraid to make mistakes and experiment with different techniques.
In conclusion, this step-by-step drawing lesson provides a guide for drawing a foot. By following these instructions and practicing regularly, you can enhance your drawing skills and create realistic foot drawings. Keep in mind that each person's foot may have slight variations, so don't hesitate to adapt the steps to match the desired style or reference. Enjoy the process of learning and exploring the art of drawing!